

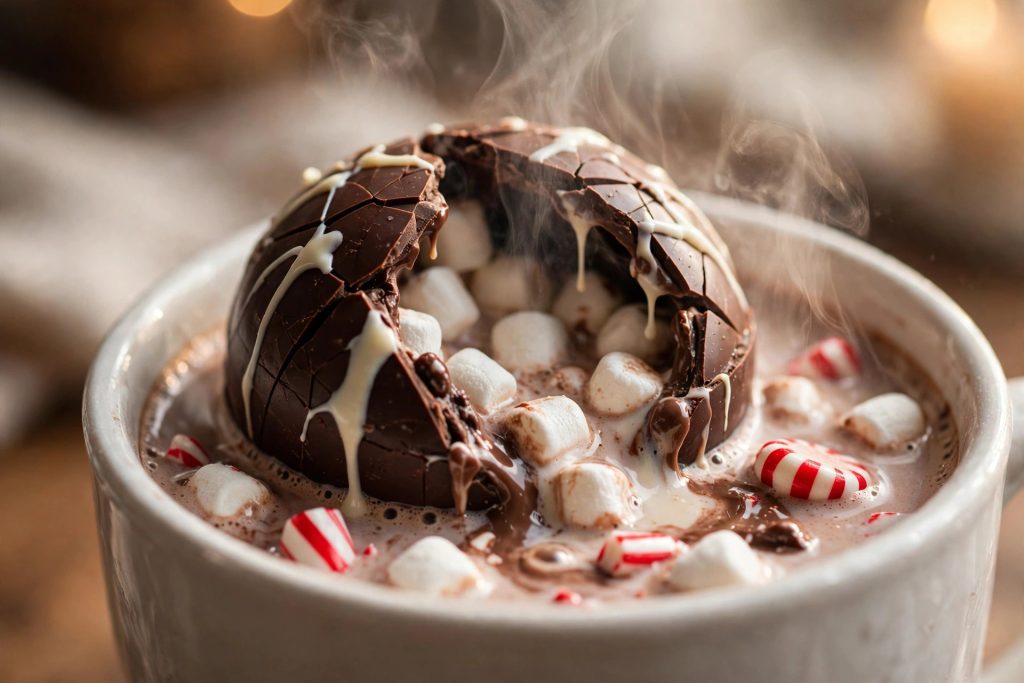
Hot chocolate bombs are the Christmas treat that turns an ordinary mug of cocoa into a little show. Each one is a glossy chocolate sphere, filled with cocoa mix and a cloud of mini marshmallows, finished with a white chocolate drizzle and crushed candy canes. Set one in a mug, pour steaming milk over it, and the shell melts open right in front of you — the filling spills out, the marshmallows float up, and a minute later you are holding the richest, creamiest cup of hot chocolate of the season. They look like something from a fancy chocolate shop, but they are surprisingly simple to make: melted chocolate, a silicone sphere mold, and about 40 minutes of hands-on work. They make wonderful edible gifts, they are the star of any hot chocolate bar, and they are the easiest way to make a cold December evening feel like a celebration.
Why This Hot Chocolate Bombs Recipe Works
- Two thin coats make a perfect shell. A single thick layer cracks when you unmold it; two thin coats are strong, even, and melt in seconds under hot milk.
- The filling is exactly measured. One tablespoon of cocoa mix and a small handful of mini marshmallows per bomb gives a rich, sweet cup — never watery, never gritty.
- The warm-plate seal actually holds. Melting the rim on a warm plate gives a clean, strong seam that will not split apart in the mug.
- They are a gift and a dessert in one. Wrapped in a cellophane bag with a ribbon, a hot chocolate bomb is the homemade present everyone loves to receive — and the one that costs almost nothing to make.
- Make-ahead friendly. The finished bombs keep for weeks at room temperature, so you can make a whole batch now and have cocoa ready for every cold night in December.
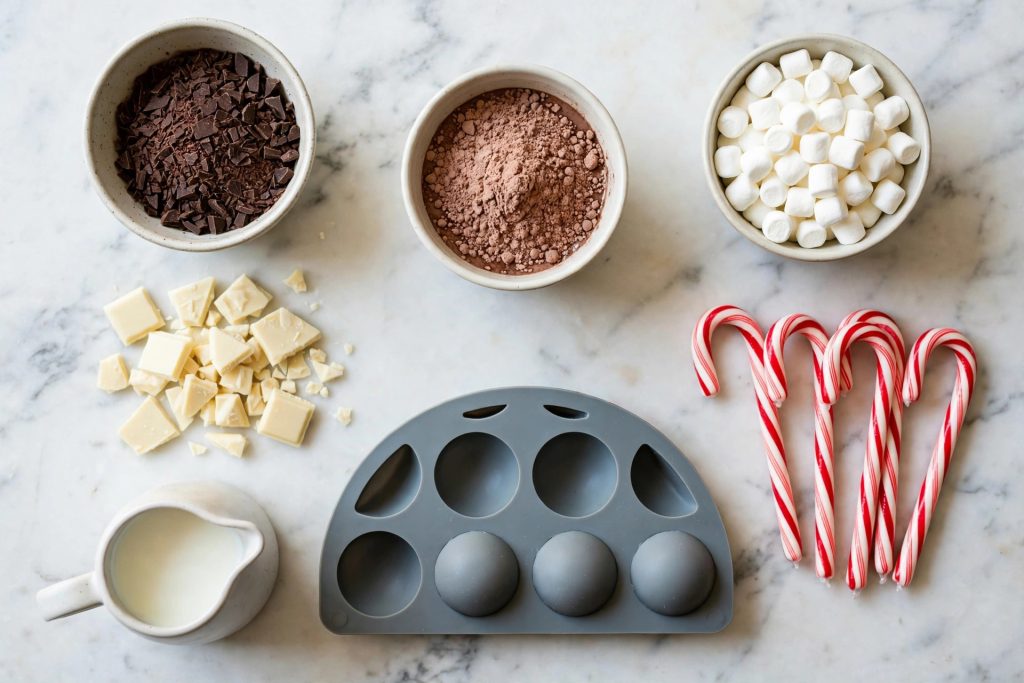
Ingredients for Hot Chocolate Bombs
- 12 ounces (340 g) semisweet or dark chocolate, finely chopped (or good-quality melting wafers)
- 6 tablespoons hot chocolate mix (1 tablespoon per bomb)
- 3/4 cup mini marshmallows
- 2 ounces (57 g) white chocolate, finely chopped, for drizzling
- 2 tablespoons crushed candy canes or festive sprinkles, for decorating
- 6 cups whole milk, for serving (1 cup per mug)
How to Make Hot Chocolate Bombs
- Make the shells: Place the semisweet chocolate in a microwave-safe bowl and microwave at 50% power in 30-second intervals, stirring well between each one, until completely melted and smooth. Do not overheat — the chocolate should be fluid and glossy.
- Coat the molds: Spoon about 1 tablespoon of melted chocolate into each cavity of a silicone half-sphere mold (2.5-inch, 6-cavity). Use the back of the spoon or a small brush to spread the chocolate evenly up the sides and over the rim. Chill for 10 minutes, then add a second thin coat, paying attention to the edges. Chill for 10 minutes more, until completely firm.
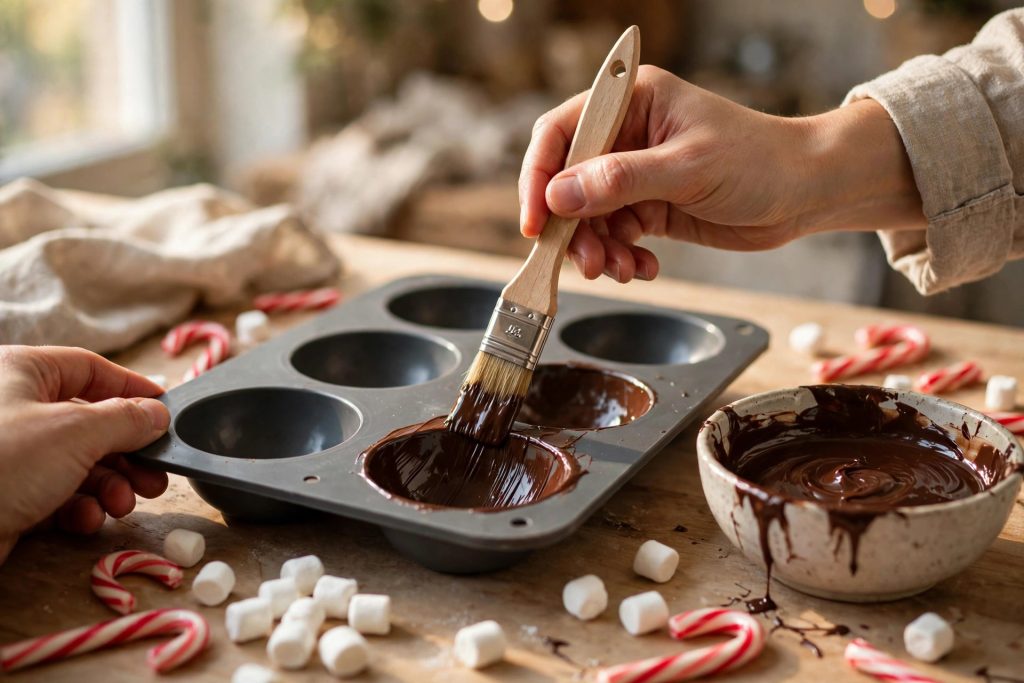
- Unmold carefully: Gently flex the silicone mold and pop the shells out one at a time. You need 12 halves for 6 bombs. If a shell cracks, re-melt it and coat again.
- Fill the bombs: Place 6 of the shell halves open-side up. Add 1 tablespoon of hot chocolate mix and a small handful of mini marshmallows (about 2 tablespoons) to each one.
- Seal the spheres: Warm a small plate in the microwave for 30 seconds. Set an empty shell half rim-down on the warm plate for 2–3 seconds to melt the edge slightly, then immediately press it onto a filled half. Hold for a few seconds, then run a finger around the seam to smooth it. Repeat for the remaining bombs, then chill for 5 minutes to set the seams.
- Decorate: Drizzle the melted white chocolate over the tops of the bombs with a spoon or piping bag, then sprinkle with crushed candy canes or festive sprinkles before the drizzle sets. Chill for 5 minutes.
- Serve: Place one hot chocolate bomb in a large mug. Heat 1 cup of whole milk until steaming (not boiling), then pour it slowly over the bomb. Watch the shell melt open and the marshmallows float up, then stir until smooth and creamy.
Pro Tips for Perfect Hot Chocolate Bombs
- Use chocolate you would enjoy eating on its own. Cheap chocolate chips often contain stabilizers that make thick, dull shells; chopped couverture or melting wafers give a thin, glossy shell that melts fast.
- Two thin coats beat one thick coat. A single thick layer is hard to spread evenly and cracks when you unmold it; two thin layers are strong, even, and melt in seconds under hot milk.
- Keep your hands cool and work quickly once the shells are out of the mold. Warm hands melt the chocolate — handle shells by the edges and return them to the fridge between steps if your kitchen is warm.
- Seal with a warm plate, not your fingers. A quick touch on a warm plate melts the rim evenly and gives a clean, strong seal that will not split in the mug.
- Serve the milk steaming hot, not just warm. Milk that is only lukewarm will not melt the shell all the way through — heat it until you see steam rising and tiny bubbles at the edge of the pan.
Variations
- Peppermint hot chocolate bombs: Swap the hot chocolate mix for a peppermint cocoa mix and use crushed candy canes in the filling as well as on top.
- White chocolate bombs: Make the shells from white chocolate and fill them with white hot chocolate mix, mini marshmallows, and a pinch of cinnamon.
- Salted caramel bombs: Add 1 teaspoon of caramel sauce and a pinch of flaky sea salt to each filled half before sealing.
- Mocha bombs: Stir 1/2 teaspoon of instant espresso powder into the cocoa mix in each bomb for a grown-up coffee kick.
- Grinch bombs: Tint melted white chocolate green with oil-based food coloring for the shells, fill with white hot chocolate mix, and top with a red heart sprinkle.
Storage and Make-Ahead
Hot chocolate bombs keep in an airtight container at cool room temperature for up to 3 weeks — keep them away from heat and sunlight, and do not refrigerate them once decorated, or the shells can bloom and turn cloudy. For gifting, wrap each bomb in a small cellophane bag, tie it with ribbon, and attach a tag that says “Pour 1 cup of hot milk over the bomb and stir.” They also freeze well for up to 2 months: freeze the finished, fully set bombs in a single layer in a freezer-safe container, then thaw at room temperature for 30 minutes before using.
Frequently Asked Questions
What kind of chocolate is best for hot chocolate bombs?
Chopped semisweet or dark chocolate (55–70% cocoa) or good-quality melting wafers. Both melt smoothly and set into a thin, glossy shell. Avoid regular chocolate chips if you can — their stabilizers make thick shells that melt slowly.
Do I need a special mold?
A silicone half-sphere mold (2.5-inch, 6-cavity) is the easiest tool and costs very little. In a pinch, you can form shells over the back of a lightly greased measuring cup or a small round bowl, but the mold gives the cleanest, most even results.
Why did my shells crack when I unmolded them?
The shell was too thin in spots, or it was still slightly soft. Use two coats and make sure the chocolate reaches all the way over the rim of each cavity, and chill until the chocolate is completely firm and pulls away from the mold easily.
How hot should the milk be?
Steaming hot — heat it until you see steam rising and tiny bubbles forming at the edge of the pan, just below a simmer (about 170°F / 77°C). Lukewarm milk will not melt the shell all the way through.
Can I make hot chocolate bombs ahead for gifts?
Yes — that is one of the best things about them. They keep for up to 3 weeks at cool room temperature in an airtight container, so you can make a whole batch in one afternoon and have gifts ready for teachers, neighbors, and stockings.

Hot Chocolate Bombs
Ingredients
- 12 ounces semisweet or dark chocolate, finely chopped (or good-quality melting wafers) (340 g)
- 6 tablespoons hot chocolate mix 1 tablespoon per bomb
- 3/4 cup mini marshmallows
- 2 ounces white chocolate, finely chopped, for drizzling (57 g)
- 2 tablespoons crushed candy canes or festive sprinkles for decorating
- 6 cups whole milk for serving (1 cup per mug)
Instructions
- Make the shells: place the semisweet chocolate in a microwave-safe bowl and microwave at 50% power in 30-second intervals, stirring well between each one, until completely melted and smooth. Do not overheat — the chocolate should be fluid and glossy.
- Coat the molds: spoon about 1 tablespoon of melted chocolate into each cavity of a silicone half-sphere mold (2.5-inch, 6-cavity). Use the back of the spoon or a small brush to spread the chocolate evenly up the sides and over the rim. Chill for 10 minutes, then add a second thin coat, paying attention to the edges. Chill for 10 minutes more, until completely firm.
- Unmold carefully: gently flex the silicone mold and pop the shells out one at a time. You need 12 halves for 6 bombs. If a shell cracks, re-melt it and coat again.
- Fill the bombs: place 6 of the shell halves open-side up. Add 1 tablespoon of hot chocolate mix and a small handful of mini marshmallows (about 2 tablespoons) to each one.
- Seal the spheres: warm a small plate in the microwave for 30 seconds. Set an empty shell half rim-down on the warm plate for 2–3 seconds to melt the edge slightly, then immediately press it onto a filled half. Hold for a few seconds, then run a finger around the seam to smooth it. Repeat for the remaining bombs, then chill for 5 minutes to set the seams.
- Decorate: drizzle the melted white chocolate over the tops of the bombs with a spoon or piping bag, then sprinkle with crushed candy canes or festive sprinkles before the drizzle sets. Chill for 5 minutes.
- Serve: place one hot chocolate bomb in a large mug. Heat 1 cup of whole milk until steaming (not boiling), then pour it slowly over the bomb. Watch the shell melt open and the marshmallows float up, then stir until smooth and creamy.
Notes
- Use chocolate you would enjoy eating on its own. Cheap chocolate chips often contain stabilizers that make thick, dull shells; chopped couverture or melting wafers give a thin, glossy shell that melts fast.
- Two thin coats beat one thick coat. A single thick layer is hard to spread evenly and cracks when you unmold it; two thin layers are strong, even, and melt in seconds under hot milk.
- Keep your hands cool and work quickly once the shells are out of the mold. Warm hands melt the chocolate — handle shells by the edges and return them to the fridge between steps if your kitchen is warm.
- Seal with a warm plate, not your fingers. A quick touch on a warm plate melts the rim evenly and gives a clean, strong seal that will not split in the mug.
- Serve the milk steaming hot, not just warm. Milk that is only lukewarm will not melt the shell all the way through — heat it until you see steam rising and tiny bubbles at the edge of the pan.