
There is a reason peppermint bark shows up on every Christmas cookie tray, in every gift tin, and on every holiday dessert table: it looks like it came from a fancy chocolate shop, it tastes like the holidays in a single cool, minty bite, and it asks almost nothing of you. Three ingredients, twenty minutes of hands-on work, no oven, no mixer, no thermometer — just two layers of chocolate and a shower of crushed candy canes.
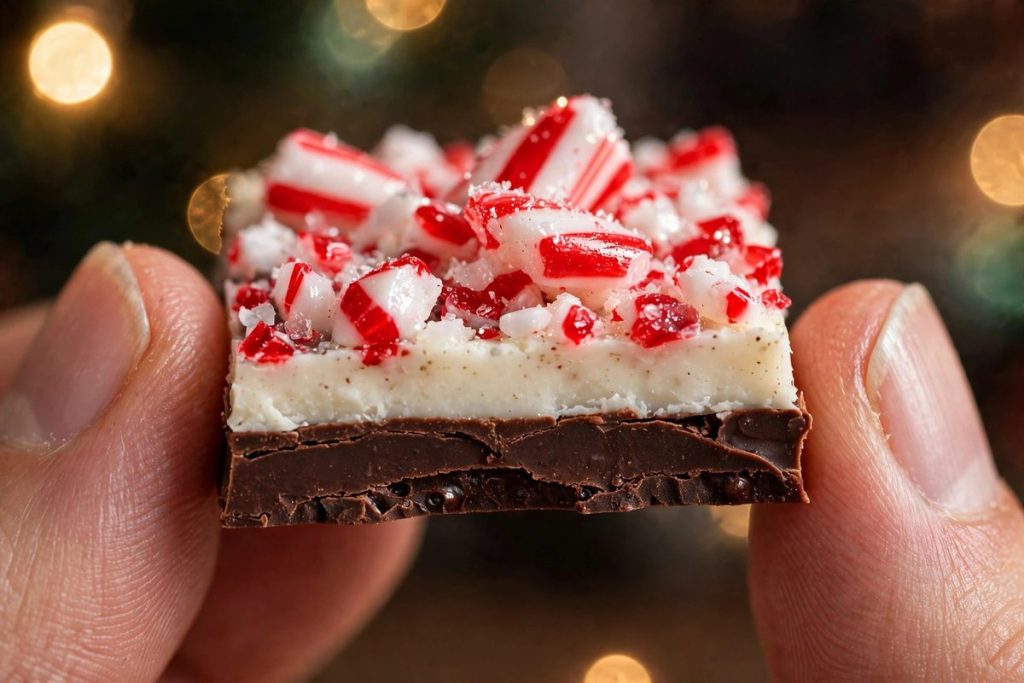
This is the classic two-layer version, the one the famous red tins made iconic: a rich dark chocolate base, a creamy white chocolate top, and red-and-white candy cane pieces pressed into the surface so every piece sparkles. It snaps cleanly, it keeps for weeks, and it is the easiest homemade gift on the whole Christmas list. Make one batch for the cookie tray, one for the neighbors, and one tin to keep for yourself — you will want it.
If you have ever had peppermint bark where the layers slid apart, the white chocolate seized into a grainy mess, or the candy canes dissolved into pink mush, this recipe was built to fix all three. The fixes are small and specific — the tacky test, the extract in the dark layer only, the crush-not-pulverize rule — and once you know them, the bark comes out perfect every time.
Why This Recipe Works
- The tacky test bonds the layers. The dark layer goes into the fridge for just 15 to 20 minutes — long enough to set, short enough to stay slightly tacky. Pour the white chocolate over a tacky surface and the two layers fuse into one piece that snaps cleanly instead of sliding apart. This single timing detail is the difference between bakery bark and a two-piece disappointment.
- Real chopped chocolate snaps; chips do not. Chocolate chips contain stabilizers that help them hold their shape in cookies, which also means they melt thick and set soft. Chopped bar chocolate melts silky and sets with a clean, sharp snap — the snap that makes peppermint bark feel like a chocolate-shop treat instead of a melted candy bar.
- The peppermint goes in the dark layer, not the white. White chocolate seizes the moment liquid extract touches it, turning grainy and unspreadable in seconds. The dark layer takes the extract happily, and the flavor carries through the whole piece anyway — cool, clean mint in every bite, with no rescue mission required.
- Crushed, not pulverized, candy canes. A mix of fine shards and small chunks gives you red sparkle on the surface and a satisfying crunch in every bite. Candy-cane dust just melts into the chocolate and turns the top pink. The rolling-pin-in-a-bag method takes thirty seconds and gives you exactly the right texture.
Ingredients
Peppermint bark
- 12 ounces (340 g) dark or semisweet chocolate, chopped (60–70% cacao)
- 12 ounces (340 g) white chocolate, chopped (with real cocoa butter)
- 1/2 teaspoon pure peppermint extract
- 1/2 cup (75 g) crushed candy canes (about 6–8 standard canes)
- Flaky sea salt, for sprinkling (optional)
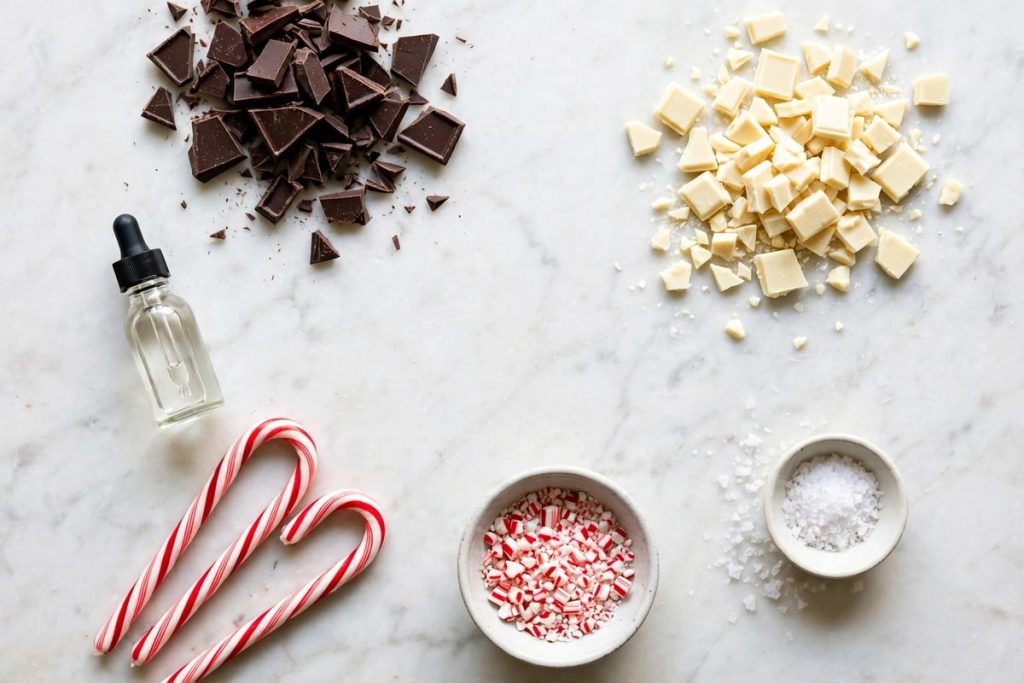
Use real chopped chocolate, not chocolate chips, for the cleanest snap — chips contain stabilizers that keep them soft. White chocolate must list cocoa butter in the ingredients; white baking chips or candy melts will not set with the same snap. Peppermint extract (not mint extract, and never peppermint oil unless it is food-grade) is what gives the bark its cool, clean flavor.
How to Make Peppermint Bark
- Crush the candy canes: place the candy canes in a zip-top bag, seal it, and crush with a rolling pin or meat mallet until you have a mix of fine shards and small pieces. Set aside 1/2 cup. Line a rimmed baking sheet (quarter-sheet pan or 9×13-inch pan) with parchment paper.
- Melt the dark chocolate: place the chopped dark chocolate in a dry microwave-safe bowl. Microwave in 30-second bursts, stirring well between each, until smooth and just melted — about 90 seconds total. Stir in the peppermint extract. (Or melt in a double boiler over barely simmering water.)
- Spread the dark layer: pour the dark chocolate onto the parchment and spread it into an even rectangle about 1/4 inch thick. Refrigerate for 15 to 20 minutes, until the surface is set but still feels slightly cool and tacky when you press it with a fingertip — not liquid, not rock-hard.
- Melt the white chocolate: while the dark layer chills, melt the white chocolate the same way — 30-second microwave bursts, stirring between each, until just smooth. Do not overheat white chocolate; it seizes easily. If it thickens, stir in 1 teaspoon of neutral oil.
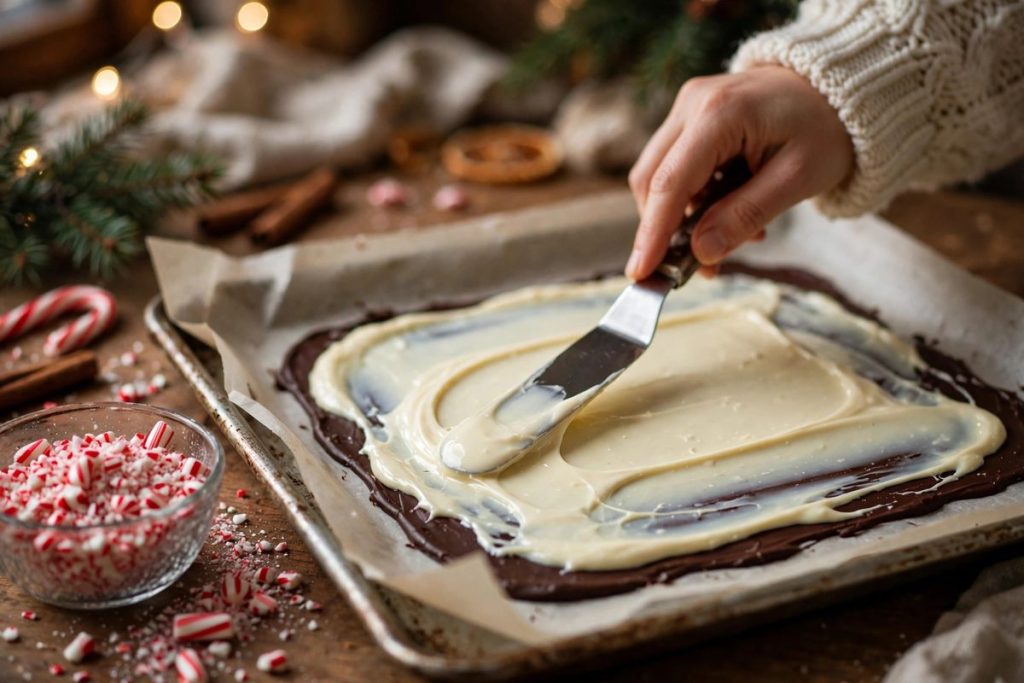
- Spread the white layer: pour the white chocolate over the dark layer and spread it quickly and evenly to the edges. Immediately scatter the crushed candy canes over the top and press them in very gently with the back of a spoon. Sprinkle with flaky sea salt, if using.
- Chill until firm: refrigerate for 30 to 45 minutes, until completely firm and cold to the touch. Do not freeze it — freezing makes the layers separate when you break it.
- Break and serve: lift the bark out by the parchment, let it sit at room temperature for 5 minutes, then break it into irregular pieces with your hands or cut it with a large sharp knife. Store in an airtight container or a gift tin lined with parchment.
Tips for the Best Peppermint Bark
- The tacky test is the whole recipe. If the dark layer is still liquid, the white layer slides off; if it is rock-hard and cold, the layers will not bond and will separate when you break the bark. Slightly cool and tacky is the sweet spot — about 15 to 20 minutes in the fridge.
- Use chopped bar chocolate, not chips. Chips are made to hold their shape, so they melt thick and set soft. Chopped bars melt silky and snap clean — that snap is the difference between homemade bark and a store-bought tin.
- Add the peppermint extract to the dark chocolate, not the white. White chocolate seizes the moment liquid extract hits it, and a seized bowl is hard to rescue. The dark layer carries the flavor through the whole piece.
- Crush, do not pulverize, the candy canes. A mix of fine shards and small chunks gives you red sparkle in every bite and a satisfying crunch — candy-cane dust just dissolves into the chocolate.
- Cut it cold but not frozen. Straight from the fridge, the bark snaps cleanly; after 5 minutes at room temperature it cuts even neater. Frozen bark shatters into shards and the layers pop apart.
- Make it a gift: layer the pieces in a tin with parchment between them, tie it with ribbon, and it keeps for 2 to 3 weeks at cool room temperature — the easiest homemade gift on the whole Christmas list.
Variations
- Triple chocolate: swap half the dark chocolate for milk chocolate for a sweeter, milder base — kids tend to prefer this version, and it still snaps beautifully.
- Pretzel crunch: scatter 1/2 cup of crushed pretzels over the dark layer before the white chocolate goes on. Salty, crunchy, and the sweet-salty bite is addictive.
- Oreo bark: press crushed Oreo cookies into the white chocolate along with the candy canes for a cookies-and-cream twist that disappears fast at parties.
- Dark chocolate only: skip the white layer entirely and top the dark chocolate with candy canes and a pinch of flaky sea salt — a more grown-up, intensely chocolate version.
- White chocolate only: make a single white chocolate layer with candy canes and a few drops of red food coloring swirled through for a marbled look.
- Nutty bark: add 1/3 cup of toasted chopped pistachios or almonds with the candy canes — the green pistachios against the red and white look especially festive.
Storage & Make-Ahead
- Room temperature: the bark keeps for 2 to 3 weeks in an airtight container at cool room temperature (65–70°F), away from direct light and heat. Layer pieces with parchment so they do not stick together.
- Fridge: in warm kitchens, store it in the fridge in an airtight container for up to 1 month. Let it sit out for 5 minutes before serving so it snaps instead of shattering.
- Freezer: freeze the finished bark in a zip-top bag for up to 3 months. Thaw in the fridge overnight, then bring to room temperature for 5 minutes before breaking or serving.
- Make-ahead plan: make it in early December and it is ready for every gift tin, cookie tray, and party through Christmas — it is one of the few holiday treats that genuinely gets better with a little age, as the peppermint flavor mellows into the chocolate.
Frequently Asked Questions
Why did my peppermint bark layers separate? Almost always a temperature problem. If the dark layer was still liquid, the white layer slid and never bonded; if it was rock-hard and cold, the white layer could not grip it. The fix is the tacky test: 15 to 20 minutes in the fridge, until the surface is set but still feels slightly cool and tacky to the touch.
Can I use chocolate chips instead of chopped chocolate? You can, but the texture will not be the same. Chips contain stabilizers that make them melt thick and set soft, so the bark bends instead of snapping. Chopped bar chocolate is worth it here — it melts silky and sets with a clean, sharp snap.
Why did my white chocolate seize? White chocolate seizes when liquid — even a drop of water or peppermint extract — hits it while it is melted, or when it is overheated. Melt it gently in 30-second bursts, keep every bowl and utensil bone dry, and add the peppermint extract to the dark chocolate instead.
What is the difference between peppermint extract and peppermint oil? Peppermint extract is peppermint oil diluted in alcohol, and it is what most recipes use — 1/2 teaspoon is plenty. Food-grade peppermint oil is far more concentrated, so you would use only a few drops. Never use fragrance oil or non-food-grade oil, and never use mint extract, which tastes like spearmint.
Can I make peppermint bark ahead for gifts? Yes — it is one of the best make-ahead holiday gifts. It keeps for 2 to 3 weeks at cool room temperature in an airtight tin, layered with parchment. Make it in early December and it is ready for every gift on your list.
How do I get clean pieces instead of shards? Let the bark sit at room temperature for 5 minutes after chilling, then break it with your hands along natural lines — or score it with a large sharp knife while it is still slightly soft. Cutting it straight from the freezer is what shatters it into shards.
Peppermint Bark
Ingredients
Peppermint bark
- 12 ounces dark or semisweet chocolate, chopped 340 g (60–70% cacao)
- 12 ounces white chocolate, chopped 340 g (with real cocoa butter)
- 1/2 teaspoon pure peppermint extract
- 1/2 cup crushed candy canes 75 g (about 6–8 standard canes)
- Flaky sea salt for sprinkling (optional)
Instructions
- Crush the candy canes: place the candy canes in a zip-top bag, seal it, and crush with a rolling pin or meat mallet until you have a mix of fine shards and small pieces. Set aside 1/2 cup. Line a rimmed baking sheet (quarter-sheet pan or 9×13-inch pan) with parchment paper.
- Melt the dark chocolate: place the chopped dark chocolate in a dry microwave-safe bowl. Microwave in 30-second bursts, stirring well between each, until smooth and just melted — about 90 seconds total. Stir in the peppermint extract. (Or melt in a double boiler over barely simmering water.)
- Spread the dark layer: pour the dark chocolate onto the parchment and spread it into an even rectangle about 1/4 inch thick. Refrigerate for 15 to 20 minutes, until the surface is set but still feels slightly cool and tacky when you press it with a fingertip — not liquid, not rock-hard.
- Melt the white chocolate: while the dark layer chills, melt the white chocolate the same way — 30-second microwave bursts, stirring between each, until just smooth. Do not overheat white chocolate; it seizes easily. If it thickens, stir in 1 teaspoon of neutral oil.
- Spread the white layer: pour the white chocolate over the dark layer and spread it quickly and evenly to the edges. Immediately scatter the crushed candy canes over the top and press them in very gently with the back of a spoon. Sprinkle with flaky sea salt, if using.
- Chill until firm: refrigerate for 30 to 45 minutes, until completely firm and cold to the touch. Do not freeze it — freezing makes the layers separate when you break it.
- Break and serve: lift the bark out by the parchment, let it sit at room temperature for 5 minutes, then break it into irregular pieces with your hands or cut it with a large sharp knife. Store in an airtight container or a gift tin lined with parchment.
Notes
- The tacky test is the whole recipe. If the dark layer is still liquid, the white layer slides off; if it is rock-hard and cold, the layers will not bond and will separate when you break the bark. Slightly cool and tacky is the sweet spot — about 15 to 20 minutes in the fridge.
- Use chopped bar chocolate, not chips. Chips are made to hold their shape, so they melt thick and set soft. Chopped bars melt silky and snap clean — that snap is the difference between homemade bark and a store-bought tin.
- Add the peppermint extract to the dark chocolate, not the white. White chocolate seizes the moment liquid extract hits it, and a seized bowl is hard to rescue. The dark layer carries the flavor through the whole piece.
- Crush, do not pulverize, the candy canes. A mix of fine shards and small chunks gives you red sparkle in every bite and a satisfying crunch — candy-cane dust just dissolves into the chocolate.
- Cut it cold but not frozen. Straight from the fridge, the bark snaps cleanly; after 5 minutes at room temperature it cuts even neater. Frozen bark shatters into shards and the layers pop apart.
- Make it a gift: layer the pieces in a tin with parchment between them, tie it with ribbon, and it keeps for 2 to 3 weeks at cool room temperature — the easiest homemade gift on the whole Christmas list.